

Hello friends, this is Django Views Tutorial. In the last post we have installed and configured python and Django web framework in our system. Now today in this Django Views Tutorial we will create our very first Django View. If you haven’t gone through the last tutorial, I will recommend you to follow the previous post at the following link.
Python Django Tutorial for Beginners – Getting Started
We will be working on the same project we created in the post mentioned above. So let’s start.
Contents
Opening Project in PyCharm
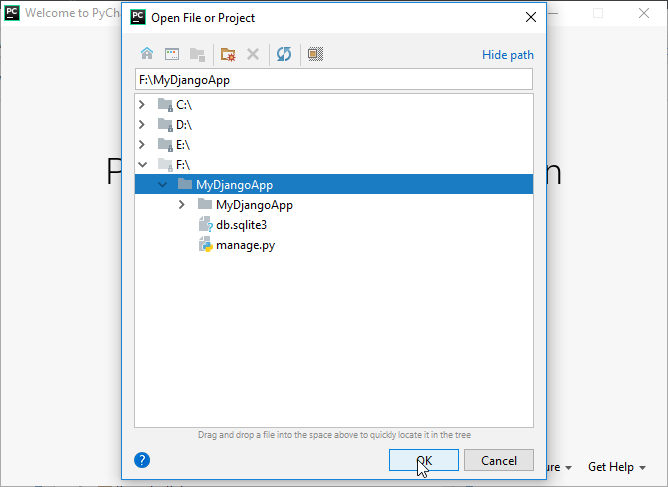
- In the last post, I told you all that we will be using PyCharm IDE. So I hope you got this IDE (The community edition is free). Now open PyCharm and open the project we created with power shell.
Creating a Django App
- Inside our project, we will now create our first Django app. And we need the terminal for this. As we are using PyCharm, we have everything in one place. To open terminal go to View -> Tool Windows -> Terminal or just press Alt + F12.
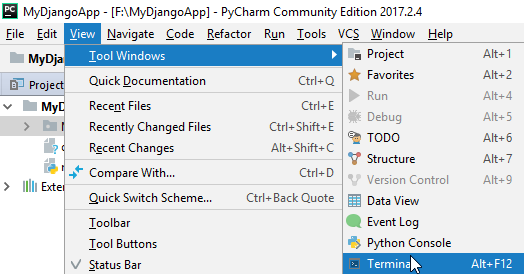
- Now you will see terminal at the bottom of PyCharm.
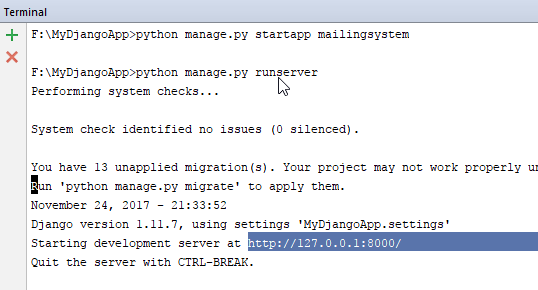
- Run the following command
|
1 2 3 |
python manage.py startapp mailingsystem |
- In the above command mailingsystem is the name of our app (you may change the name).
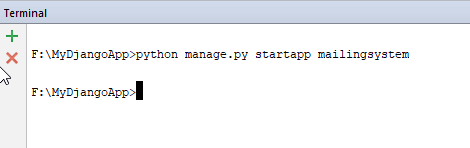
- The above command will create a new directory in your project.
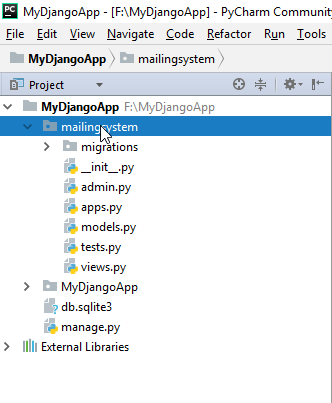
- So you can see there is a directory created in your project. It is our app. The files we can see here generated automatically with the command that we run.
Overview of Django App
Whenever we create an App, Django gives us some files and a directory by default. So before moving ahead in this Django Views Tutorial, I will give you a brief description of these files.
- migrations -> it is the first directory inside your app; it is a way to connect your website to your database. (Don’t worry if it is getting out of your head, we will see this in detail in upcoming tutorials).
- _int_.py -> This file tells the python to see the directory as a python app. So if the file is inside the directory is not a normal one, but it is a python app.
- admin.py -> Every website has an admin section, and it is the coolest thing with python that it automatically creates the admin functionality.
- apps.py -> It is the configuration file of our app.
- models.py -> A model is basically the blueprint of our database. It defines how data goes to our database.
- tests.py -> With this you can create some tests to debug your app.
- views.py -> This is the focus of this post, the views. Views are just python function. Views take user request and give them back something. Like user will request there profile and view will show him his profile.
Django Views Tutorial – Creating Our First View
We have discussed the default files and folders briefly. Now let’s create our first view.
- Come inside your app (mailingsystem) and open the file views.py
- Write the following code.
|
1 2 3 4 5 6 |
from django.http import HttpResponse def index(request): return HttpResponse("<h1>Welcome to Mailing System Python Django App</h1>") |
What we did?
- In the above code we have imported HttpResponse
- Then we created a simple method named index that is taking a parameter request and it is simply returning a HttpResponse. The response is a normal h1 tag with a message. The code is very simple.
Defining URL Pattern
- Now we need a URL so that user can request the view. If you will open MyDjangoApp you will see a urls.py file. It contains the URLs information like where to go with the URL specified. We will create the same file inside our app. So create a file named urls.py in our app directory.
- Write the following code
|
1 2 3 4 5 6 7 8 |
from django.conf.urls import url from . import views urlpatterns = [ url(r'^$', views.index, name='index') ] |
What we did?
- In the above code we have imported url and then we imported our views.
- Now we have defined a url pattern
r means a regular expression, after that it starts with a caret and ends with a dollar, but as you can see we have not written anything. That means this is the pattern for our home page. So the pattern is for URL mailingsystem/ only. - When the user will request mailingsystem/ our view index will be displayed.
- If we want to be specific inside mailingsystem/ like for send mail we want to define a new url e.g mailingsystem/send we can define a new url pattern. But when the user request only mailingsystem/ without any further specification it will display the view index.
But the problem is when we launch the app the Django looks inside the urls.py file of our Project not our app. And the file urls.py of our project don’t knows anything about our mailingsystem. So come inside urls.py of the MyDjangoApp and modify it as follows.
|
1 2 3 4 5 6 7 8 9 |
from django.conf.urls import include, url from django.contrib import admin urlpatterns = [ url(r'^admin/', admin.site.urls), url(r'^mailingsystem/', include('mailingsystem.urls')) ] |
What we did?
- We have added include after import on the first line. It will include our files.
- Then we have defined a new url mailingsystem/ and whenever the user will request this url mailingsystem, check the file urls.py inside app mailingsystem.
Running The App
Now we have created the view. To test it just go to the URL that we specified. http://127.0.0.1:8000/mailingsystem/
But first we need to start the server by running the command python manage.py runserver , and this time we will run this command in the PyCharm terminal.
Now you can go to http://127.0.0.1:8000/mailingsystem/ in your browser, and you should see the following output.
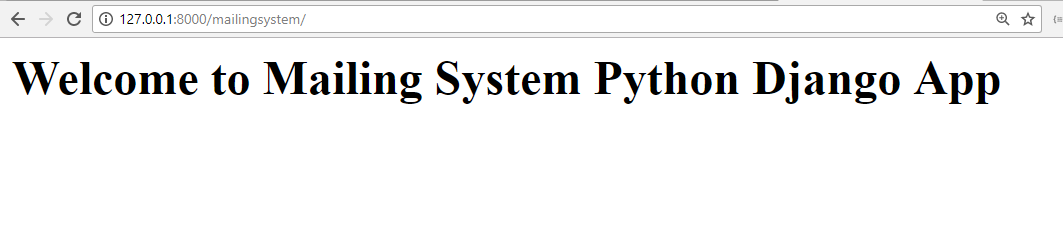
Bingo! We have successfully created our first view. Now I am wrapping up this Django Views Tutorial here friends.
Next Post: Django Templates Tutorial – Creating A Simple Template
That’s all for this Django Views Tutorial. Feel free to ask with comments if you are having any confusions related to this Django Views Tutorial. Thank You 🙂
You haven’t told about registering “MyDjangoApp” in the “settings.py” here, which is causing error while accessing the “localhost:8000/firsttemplate” and the error simply says that there is no “index.html” that’s because you haven’t register/install app in the project, so that django can see that template in the app’s “templates” folder.
This line cause error:
url(r’^mailingsystem/’, include(‘mailingsystem.urls’))
Needed to compose you a very little word to thank you yet again regarding the nice suggestions you’ve contributed here.