

Hi there, today we will see Django ModelForm Example. If you remember the last post, we saw how to implement ListView and DetailsView using generic views. We created a page to take an input of the title and description of a product and then displayed it using ListView and DetailsView.
The point which I am concerned with is that we had to configure the saving of the data into the database ourselves in the last post. Now what if I told you that we don’t need to manage the database operations by our own in this post. Django will do it all for us. Not only that, it will also create forms (without writing actual html form ), allow us to update(using UpdateView class) and delete the data(using DeleteView class) on the database without actually having to write any subsequent code for database related tasks.
Yeah, Model forms along the with class based views are meant for the purposes mentioned above. It pretty much simplifies the things for a developer doing database related tasks. I know this just increased your energy level to learn Model forms. So, without any delay, let’s get started.
To learn Model forms, we’ll take the same example as in the previous post which you must go through before moving ahead in this post. It will help you get a good grasp over class based views.The link is given below.
Django Class Based Views for Implementing List and DetailsView
Django ModelForm Example Overview
We will be doing the following in this Django ModelForm Example
- Create a Page for entry of a Product information(title, price and description) and save it into the db(which will be done automatically by model forms).
- Create the index page where we would view the product entries in an unordered list.
- On the index page, with each product entry, we would also add the delete and update buttons and configure their functions.
Now that you know what we will be dealing with in this post, let’s start coding the app.
Django ModelForm Example
Creating a new Django Project
- Run your Windows PowerShell in Administrator Mode and run the following command to navigate into the desktop directory :
|
1 2 3 |
cd ~/Desktop |
- Run the command below to start a project new django project:
|
1 2 3 |
django-admin startproject website |
- As you do, you will see a folder on your desktop containing the django files named website
- Open the folder in any Django IDE or any text editor will work fine.
- Run the command below to change the directory of PowerShell to the folder “website”:
|
1 2 3 |
cd website |
Creating a new App inside the Project
- Run the command below to start a new app into your project.
|
1 2 3 |
python manage.py startapp modelforms |
- Here, modelforms is the name of your app. As your run the above command, a folder named modelforms will show up in the website folder.
Coding the App
Creating Model
- As usual, we need to deal with some data (title, price and desciption). So, we need to create the model of the data and implement that model into the sqlite db of django.
- To do so, look for the file models.py in your app folder and add the code below:-
|
1 2 3 4 5 6 7 8 9 10 11 12 13 14 15 16 17 |
from django.db import models # Create your models here. from django.urls import reverse class Product(models.Model): product_title = models.CharField(max_length=100) product_price = models.CharField(max_length=5) product_desc = models.CharField(max_length=100) # on submit click on the product entry page, it redirects to the url below. def get_absolute_url(self): return reverse('modelforms:index') |
- The function get_absolute_url in the above code simply returns the url to which the the product entry page is forwaded once the submit button is hit. In this case, it will return to the index page after the product entry.
- To generate the form, model forms simply access the the models.py. The names of the parameters here become the respective labels in the form followed by a input box.
Registering Model
- Now we need to register the above model into the admin.py file in the users folder. To do so, add the following code to the admin.py file present in your app folder.
|
1 2 3 4 5 6 7 8 |
from django.contrib import admin # Register your models here. from modelforms.models import Product admin.site.register(Product) |
- By now, the model of the database is ready. But we need to implement this database into the SQLite db. Doing so the SQLite db will create its own model of the same dataset. To do so, open the Windows PowerShell and the follow the commands given below.
Making Migrations
- Make sure that the shell is navigated into the website folder and run the following command.
|
1 2 3 |
python manage.py makemigrations modelforms |
- Next, run the command below to actually implement it into the database.
|
1 2 3 |
python manage.py migrate |
- By now, the database is created into the sqlite db.
Now comes the section where the real magic happens.
Configuring the Views
- Yes, the class based views reduce our efforts to quite an extent.
- So, look for the file views.py in your app folder and add the following code:-
|
1 2 3 4 5 6 7 8 9 10 11 12 13 14 15 16 17 18 19 20 21 22 23 24 25 26 27 28 29 30 31 32 33 34 35 |
from django.views import generic from django.views.generic.edit import CreateView, UpdateView, DeleteView from django.core.urlresolvers import reverse_lazy # Create your views here. from modelforms.models import Product # view for the index page class IndexView(generic.ListView): # name of the object to be used in the index.html context_object_name = 'product_list' template_name = 'modelforms/index.html' def get_queryset(self): return Product.objects.all() # view for the product entry page class ProductEntry(CreateView): model = Product # the fields mentioned below become the entry rows in the generated form fields = ['product_title', 'product_price', 'product_desc'] # view for the product update page class ProductUpdate(UpdateView): model = Product # the fields mentioned below become the entyr rows in the update form fields = ['product_title', 'product_price', 'product_desc'] # view for deleting a product entry class ProductDelete(DeleteView): model = Product # the delete button forwards to the url mentioned below. success_url = reverse_lazy('modelforms:index') |
- In the above code, we made use of following classes in the views:-
- generic.ListView- To fetch the data from the db and display it using the html.
- CreateView- To create the form corresponding to the model of the data as in models.py
- UpdateView- To create the form for the update of the product info and update the db accordingly.
- DeleteView- To delete the selected product entry from the db.
By now, the backend of the app is ready.
It’s time to write some htmls i.e working on the templates for this project.
Creating UI for Django model forms example
- Firstly create a directory named templates into the folder modelforms.
- Now, in the templates folder, create another directory named modelforms and it should be like /modelforms/templates/modelforms/.
- In the modelforms folder present in templates directory, create a new HTML file called product_form.html and add the following code:-
|
1 2 3 4 5 6 7 8 9 10 11 12 13 14 15 16 |
<h3>Add a New Product</h3> {% if error_message %} <p><strong>{{ error_message }}</strong></p> {% endif %} <form action="" method="post" enctype="multipart/form-data"> {% csrf_token %} {% include 'music/form-template.html' %} <div class="form-group"> <div class="col-sm-offset-2 col-sm-10"> <button type="submit" class="btn btn-success">Submit</button> </div> </div> </form> |
- In the same directory, create another html file named index.html and add the code below .This will act as a home page and display the list of product_entries.
|
1 2 3 4 5 6 7 8 9 10 11 12 13 14 15 16 17 18 19 20 21 22 23 24 25 26 27 28 29 30 31 32 33 34 35 36 37 38 |
{% if product_list %} {% for product in product_list %} <ul> <li> <h2> Product-Title:{{ product.product_title }}</h2> <h2>Price:${{ product.product_price }}</h2> <h2>Description:{{ product.product_desc }} </h2> <form action="{% url 'modelforms:product-delete' product.id %}" method="post" style="display: inline;"> {% csrf_token %} <button type="submit" class="btn btn-default btn-sm">Delete</button> </form> <form action="{% url 'modelforms:product-update' product.id %}" method="post" style="display: inline;"> {% csrf_token %} <button type="submit" class="btn btn-default btn-sm">Update</button> </form> </li> </ul> {% endfor %} {% else %} <h1>No product entries found on the database.</h1> {% endif %} <form action="{% url 'modelforms:product-entry' %}" method="post" style="display: inline;"> {% csrf_token %} <button type="submit" class="btn btn-default btn-sm">Make a Product entry here</button> </form> |
- In the same directory, create one last html file named form-template.html and add the code below .This will serve as a base template for each field in the form. You can see this included in the html of the file product_form.html:-
|
1 2 3 4 5 6 7 8 9 10 11 |
{% for field in form %} <div class="form-group"> <div > <span class="text-danger la">{{ field.errors }}</span> </div> <label >{{ field.label_tag }}</label> <div class="col-sm-10">{{ field }}</div> </div> {% endfor %} |
- We’re almost done. The UI and backend both are ready. We just need to link the broken ends by configuring the urls. To do so, create a file named urls.py in your app folder and add the code below:-
|
1 2 3 4 5 6 7 8 9 10 11 12 13 14 15 16 17 18 19 20 21 22 23 |
from django.conf.urls import url from modelforms import views app_name = 'modelforms' urlpatterns = [ # /modelforms/ url(r'^$', views.IndexView.as_view(), name='index'), # modelforms/product/entry url(r'^product/entry/$',views.ProductEntry.as_view(),name='product-entry'), # modelforms/product/2 url(r'^product/(?P<pk>[0-9]+)/$', views.ProductUpdate.as_view(), name='product-update'), # modelforms/product/(?P<pk>[0-9]+)/delete url(r'^album/(?P<pk>[0-9]+)/delete$', views.ProductDelete.as_view(), name='product-delete'), ] |
- Follow the comments to understand the url patterns in the above code.
Finalizing project
- In the folder website, there’s a file called urls.py. Update that file with code given below:-
|
1 2 3 4 5 6 7 8 9 10 11 |
from django.conf.urls import url, include from django.contrib import admin urlpatterns = [ url(r'^admin/', admin.site.urls), url(r'^modelforms/',include('modelforms.urls')) ] |
- Just one last step. Mention your app into the INSTALLED APPS category in the file settings.py in your website folder as shown below:-
|
1 2 3 4 5 6 7 8 9 10 11 |
INSTALLED_APPS = [ 'modelforms.apps.ModelformsConfig',# this line is added 'django.contrib.admin', 'django.contrib.auth', 'django.contrib.contenttypes', 'django.contrib.sessions', 'django.contrib.messages', 'django.contrib.staticfiles', ] |
- That’s it. We are done coding the app.
Running the App
- Now lets try running the app. Make sure your development server is running. If not you can use the following command in your Windows PowerShell to run your development server.
|
1 2 3 |
python manage.py runserver |
Django Model Forms Example
- Now go to the url http://127.0.0.1:8000/modelforms/ to see your list of product entries:-
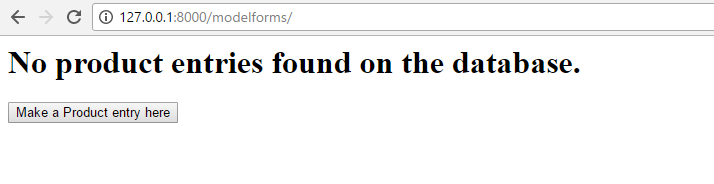
- As expected, since the database is empty, it says no product entries found on the database. So, go ahead and hit the “Make a Product entry here” button and it will to take you to the product_entry page as shown in the image below:-
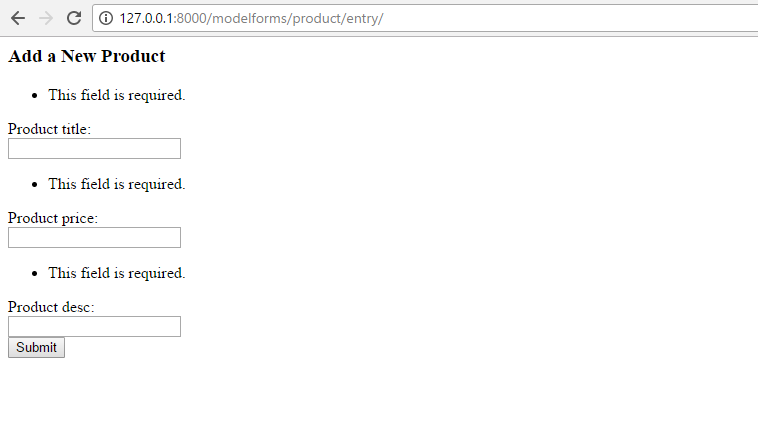
- Fill the form shown in the image above and hit the submit button. It shall take you to the index page and you will find the product entry you just made in the product_list as shown in the image below:-
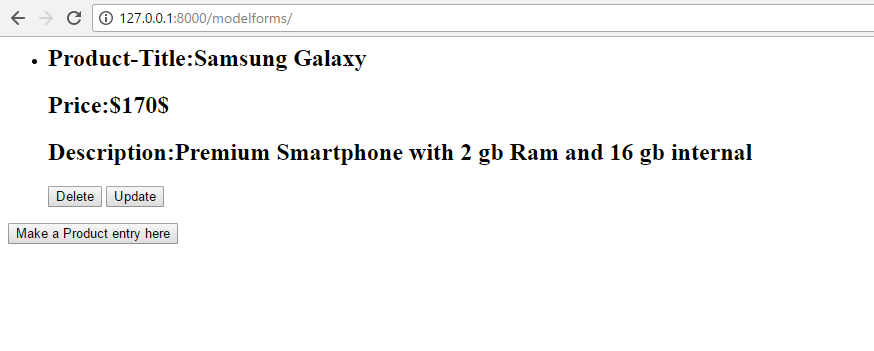
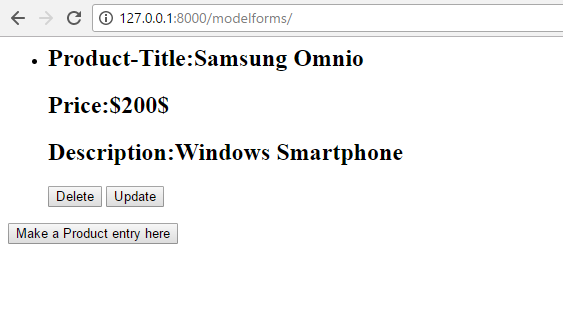
- In the above image, the delete and update buttons can be seen.So, go ahead and hit the delete button and you will see the result as shown below. Hitting the delete button simply deletes that particular data from the database.
- If you would have hit the update button, you would have been welcomed by the product entry page. And the data which you entered newly for the product overwrites the previous one.
- Great! It worked out just as expected.
- You successfully followed this post till the end with full enthusiasm. Congratulations, you are a true django learner. And if you are having some troubles get the source code of this Django ModelForm Example from below.
[sociallocker]Django ModelForm Example Source Code[/sociallocker]
So thats all for this Django ModelForm Example friends. Stay tuned for more Django Tutorials. And please do share the post if you found it helpful. Thank You 🙂
Its very good tutorial .
and what’s that in product-form.html file,
{% include ‘music/form-template.html’ %}
music ?
i’m also getting an error in the INSTALLED APPS file, ‘modelforms.apps.ModelformsConfig’,# this line is added
no module named apps.
{% include ‘music/form-template.html’ %} gives error.Replace music to modelforms.
i’m also getting the same ERROR.
ModuleNotFoundError: No module named ‘modelforms.urls’
why people upload the Wrong code.
url(r”^modelforms/”, include(‘modelforms.urls’))
you have to include as above
TemplateDoesNotExist at /modelforms/
modelforms/index.html, modelforms/product_list.html
Request Method: GET
Request URL: http://127.0.0.1:8000/modelforms/
Django Version: 2.0.1
Exception Type: TemplateDoesNotExist
Exception Value:
modelforms/index.html, modelforms/product_list.html
Exception Location: C:\Users\Naresh\AppData\Local\Continuum\Anaconda3\lib\site-packages\django\template\loader.py in select_template, line 47
Python Executable: C:\Users\Naresh\AppData\Local\Continuum\Anaconda3\python.exe
Python Version: 3.6.1
Python Path:
[‘C:\\Users\\Naresh\\Desktop\\website’,
‘C:\\Users\\Naresh\\AppData\\Local\\Continuum\\Anaconda3\\python36.zip’,
‘C:\\Users\\Naresh\\AppData\\Local\\Continuum\\Anaconda3\\DLLs’,
‘C:\\Users\\Naresh\\AppData\\Local\\Continuum\\Anaconda3\\lib’,
‘C:\\Users\\Naresh\\AppData\\Local\\Continuum\\Anaconda3’,
‘C:\\Users\\Naresh\\AppData\\Local\\Continuum\\Anaconda3\\lib\\site-packages’,
‘C:\\Users\\Naresh\\AppData\\Local\\Continuum\\Anaconda3\\lib\\site-packages\\Sphinx-1.5.6-py3.6.egg’,
‘C:\\Users\\Naresh\\AppData\\Local\\Continuum\\Anaconda3\\lib\\site-packages\\win32’,
‘C:\\Users\\Naresh\\AppData\\Local\\Continuum\\Anaconda3\\lib\\site-packages\\win32\\lib’,
‘C:\\Users\\Naresh\\AppData\\Local\\Continuum\\Anaconda3\\lib\\site-packages\\Pythonwin’,
‘C:\\Users\\Naresh\\AppData\\Local\\Continuum\\Anaconda3\\lib\\site-packages\\setuptools-27.2.0-py3.6.egg’]
Server time: Mon, 19 Mar 2018 05:09:10 +0000
Nice tutorial
Hi Manish,
Steps you have provided is working for me. I have not used your html forms.
Dear all
First thanks for this and all the other great tutorials.
A small advice from my side. For 24 hours it was driving me crazy that when I tried to start the runserver it gave me an error message about the urlCONF in the website’s url.py. But as I tested again and again I finally found that it was neither the website’s url.py or the app’s url.py. Instead the problem was with the app’s views.py. There we had this import of django.core.urlresolvers for reverse_lazy. And this seems to be a depricated module. As I found here, it had to be changed to django.urls. And voila, it worked and the runserver could be started.
Best regards
M